Squeaks in timber floor systems always have a cause, here’s how to find yours. By George Dolezal, principal engineer, Meyer Timber
Timber floor systems have been used in residential housing for centuries. They are a natural material, renewable, light and stronger than steel (in a weight-to-weight comparison). Builders are well aware of specific attributes when working with timber in terms of expansion and contraction with moisture and long-term creep deflection as the natural fibres settle. Specifiers are also designing timber floor systems to account for dynamic performance to limit bounce as well as overall stiffness.
It appears, however, that in recent times some bad habits have started to creep into the installation of timber floor systems that can cause a headache for builders and homeowners – a squeaky floor. There are some typical areas that increase the likelihood of floor system squeak. An early reminder to carpenters asking them to focus on the following elements can help avoid problems occurring with no additional time spent. Later in the construction process however, it can be difficult to isolate any issues, especially when internal linings are installed and visual inspection is limited.
Brackets. This is the easiest place to start and the most common cause of a noisy floor. Any movement around a bracket will result in rubbing and potential squeak.
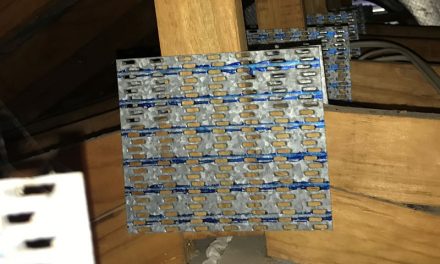
- Steel-to-steel contact: I have seen lately that people are tending to skew nail the joists into the beam before installing the bracket. This is not recommended and should be discouraged as the skew nail can rub against the bracket and it also tends to cause flange splitting at supports. Other steel-on-steel contact can occur between brackets and steel beams and between brackets and nail plates in floor trusses.
- Steel-to-timber contact: if the joist is not seated properly in the bracket, any load from above will cause movement between the joist and bracket. This can be remedied by installing a 6g x 30mm wafer-head screw from the underside to pull the joist tight into the bracket base.
- Timber-to-timber contact: joists wedged in between beams will have the ends in contact with the bearers which can cause noise as the joist deflects. A 1–2mm gap should be placed between the joist and the bearer.
Flooring sheets to joists. Flooring installation guides usually recommend use of an adhesive between the flooring and the joists. This is designed to prevent any timber-to-timber contact, which can result in a noisy floor. The flooring glue may be elastomeric to provide some movement between sheets and joists, or rigid to give some additional stiffness to the system. You should consult adhesive suppliers on the suitability of a particular glue for flooring to joist applications. The important factors with flooring glue are quantity (too little glue can result in timber-to-timber contact) and setting time (if the glue bead sets before flooring is installed a proper bond may not be achieved). In fixing the flooring down, screws are always better than nails, and if using nails then ring shank or twist shank are preferable. This is all to give a clamping force and prevent any movement between sheets and joists. Finally, there is the spacing of fasteners. Typically, they are spaced closer around the edges (150mm centres) and further apart within the sheet (300mm centres) but with a number of new products becoming available, make sure you check the specific install guides.
Floor sheet tongue and groove. This is not overly common and normally results from floor sheets that have been stored incorrectly. If there is too much edge swell around the tongue and groove there is potential for movement in this region between joists. Post installation remediation can include installing blocks on flat under joins to prevent movement, but by keeping the sheets dry before erection you will not have this problem.
Fixing to supports below. This can happen more in subfloor scenarios where the bearers are not properly fixed to the underlying supports. Any settlement can cause a gap until someone walks above when there will be movement and noise.
Fixing of walls above. A recent site inspection I did had floor noise in the upper storey under an internal wall. This rigid wall was only connected to the floor using framing nails and the joists were clear span under, so when you walked on the floor next to the wall the joists deflected but the wall stayed in place. A simple remediation of screwing the wall down to the joists fixed the problem.
The above items are summarised in a simple flyer soon to be released by Meyer Timber: ‘Steps to minimise floor squeaks’.
From the list above you can see clearly that the majority of floor system squeaks come from some sort of movement which results in adjacent members rubbing together. When installing floor joists and flooring the ways to stop this are to provide small gaps between members, use an adhesive to remove direct contact or use appropriate fasteners to prevent long term movement between items. If all this is done and you still have a squeak, then maybe it’s time to visit the hardware shop and buy some mouse traps.
For more information on this topic, contact George Dolezal via email at Georged@meyertimber.com.au
Image: Correct I-joist top mount hanger installation.


